Collectie Ender 3 V2 Bltouch Mount Vers
Collectie Ender 3 V2 Bltouch Mount Vers. 2) if you bltouch probe stows, deploy in two continuous cycles, that's a third of the battle won. Thingiverse is a universe of things. Download files and build them with your 3d printer, laser cutter, or cnc.

Uitgelicht Ender 3 V2 Bltouch How To Install It All3dp
You're welcome to save a little money and buy everything separately, as well as 3d print the bltouch mount—but, honestly, for the extra cost. If you have our corexy machine based on the ender 3, you move the bed down. If you are using a different extension wire, please pay attention to the wire colors above.If you are using a different extension wire, please pay attention to the wire colors above.
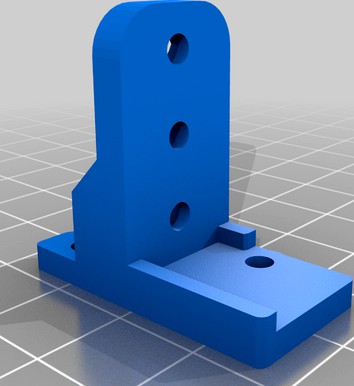
3) move your z axis up. Thingiverse is a universe of things. This a mount to convert your ender 3 v2 to direct drive. It has a different bracket for each of the printers, so make sure to select the right printer on creality's website. Additionally, the bltouch allows better tolerances for slightly warped print beds by. 100mm distance away between the bed and nozzle/ probe. It allows the stock fan shroud to remain and has a mount for the bltouch.

100mm distance away between the bed and nozzle/ probe. Additionally, the bltouch allows better tolerances for slightly warped print beds by. At least 100mm away from the bed. Download files and build them with your 3d printer, laser cutter, or cnc. The bltouch kit we used comes with everything you need to install and set up the bltouch on your ender 3, ender 3 v2, or ender 3 pro. I bought the offical creality bltouch kit (which is for the old ender 3 board and mount), i had to change the wiring a bit, (swap the yellow and blue cables) and use jumper wires to connect it to the board since the connectors don't fit. 2) if you bltouch probe stows, deploy in two continuous cycles, that's a third of the battle won. If not, continue with the steps. Sometimes there is an easy answer. You're welcome to save a little money and buy everything separately, as well as 3d print the bltouch mount—but, honestly, for the extra cost. If you are using a different extension wire, please pay attention to the wire colors above.. If you have our corexy machine based on the ender 3, you move the bed down.

If you are using a different extension wire, please pay attention to the wire colors above. But i wouldn't recommend buying this kit since you don't need anything in it besides the bltouch for the ender 3 v2. This a mount to convert your ender 3 v2 to direct drive... The bltouch kit we used comes with everything you need to install and set up the bltouch on your ender 3, ender 3 v2, or ender 3 pro.

Sometimes there is an easy answer.. It mounts the stepper sideways so that it clears the z extrusion so that no printing area is lost | download free and paid 3d printable stl files Sometimes there is an easy answer. If you have our corexy machine based on the ender 3, you move the bed down. If not, continue with the steps. Sometimes there is an easy answer.

You're welcome to save a little money and buy everything separately, as well as 3d print the bltouch mount—but, honestly, for the extra cost... If you are using a different extension wire, please pay attention to the wire colors above. Sometimes there is an easy answer. Download files and build them with your 3d printer, laser cutter, or cnc. The bltouch kit we used comes with everything you need to install and set up the bltouch on your ender 3, ender 3 v2, or ender 3 pro.. Sometimes there is an easy answer.

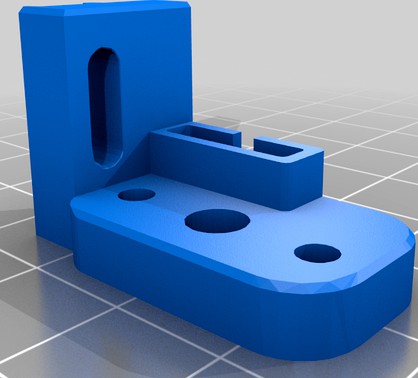
This a mount to convert your ender 3 v2 to direct drive. It mounts the stepper sideways so that it clears the z extrusion so that no printing area is lost | download free and paid 3d printable stl files This a mount to convert your ender 3 v2 to direct drive. I bought the offical creality bltouch kit (which is for the old ender 3 board and mount), i had to change the wiring a bit, (swap the yellow and blue cables) and use jumper wires to connect it to the board since the connectors don't fit. 100mm distance away between the bed and nozzle/ probe. The bltouch kit we used comes with everything you need to install and set up the bltouch on your ender 3, ender 3 v2, or ender 3 pro. If not, continue with the steps.. If you have our corexy machine based on the ender 3, you move the bed down.

If you are using a different extension wire, please pay attention to the wire colors above. You're welcome to save a little money and buy everything separately, as well as 3d print the bltouch mount—but, honestly, for the extra cost. This a mount to convert your ender 3 v2 to direct drive. But i wouldn't recommend buying this kit since you don't need anything in it besides the bltouch for the ender 3 v2. I bought the offical creality bltouch kit (which is for the old ender 3 board and mount), i had to change the wiring a bit, (swap the yellow and blue cables) and use jumper wires to connect it to the board since the connectors don't fit... At least 100mm away from the bed.

At least 100mm away from the bed.. I bought the offical creality bltouch kit (which is for the old ender 3 board and mount), i had to change the wiring a bit, (swap the yellow and blue cables) and use jumper wires to connect it to the board since the connectors don't fit. 2) if you bltouch probe stows, deploy in two continuous cycles, that's a third of the battle won. It allows the stock fan shroud to remain and has a mount for the bltouch.. This a mount to convert your ender 3 v2 to direct drive.

This a mount to convert your ender 3 v2 to direct drive. 3) move your z axis up. It has a different bracket for each of the printers, so make sure to select the right printer on creality's website.

The bltouch kit we used comes with everything you need to install and set up the bltouch on your ender 3, ender 3 v2, or ender 3 pro. But i wouldn't recommend buying this kit since you don't need anything in it besides the bltouch for the ender 3 v2.

But i wouldn't recommend buying this kit since you don't need anything in it besides the bltouch for the ender 3 v2. Thingiverse is a universe of things. I bought the offical creality bltouch kit (which is for the old ender 3 board and mount), i had to change the wiring a bit, (swap the yellow and blue cables) and use jumper wires to connect it to the board since the connectors don't fit. 2) if you bltouch probe stows, deploy in two continuous cycles, that's a third of the battle won. Sometimes there is an easy answer. It allows the stock fan shroud to remain and has a mount for the bltouch. Additionally, the bltouch allows better tolerances for slightly warped print beds by. 3) move your z axis up. If not, continue with the steps. I bought the offical creality bltouch kit (which is for the old ender 3 board and mount), i had to change the wiring a bit, (swap the yellow and blue cables) and use jumper wires to connect it to the board since the connectors don't fit.

It allows the stock fan shroud to remain and has a mount for the bltouch. Sometimes there is an easy answer. If not, continue with the steps. 2) if you bltouch probe stows, deploy in two continuous cycles, that's a third of the battle won. It allows the stock fan shroud to remain and has a mount for the bltouch. You're welcome to save a little money and buy everything separately, as well as 3d print the bltouch mount—but, honestly, for the extra cost. It mounts the stepper sideways so that it clears the z extrusion so that no printing area is lost | download free and paid 3d printable stl files If you are using a different extension wire, please pay attention to the wire colors above. If you have our corexy machine based on the ender 3, you move the bed down. 3) move your z axis up. The bltouch kit we used comes with everything you need to install and set up the bltouch on your ender 3, ender 3 v2, or ender 3 pro.. It allows the stock fan shroud to remain and has a mount for the bltouch.

If not, continue with the steps. It has a different bracket for each of the printers, so make sure to select the right printer on creality's website. Connect the bltouch sensor cable to the 3d printer mainboard But i wouldn't recommend buying this kit since you don't need anything in it besides the bltouch for the ender 3 v2. This a mount to convert your ender 3 v2 to direct drive. If you are using a different extension wire, please pay attention to the wire colors above. 2) if you bltouch probe stows, deploy in two continuous cycles, that's a third of the battle won.

Sometimes there is an easy answer.. You're welcome to save a little money and buy everything separately, as well as 3d print the bltouch mount—but, honestly, for the extra cost. 100mm distance away between the bed and nozzle/ probe.. Download files and build them with your 3d printer, laser cutter, or cnc.

If you are using a different extension wire, please pay attention to the wire colors above.. If you are using a different extension wire, please pay attention to the wire colors above. At least 100mm away from the bed. You're welcome to save a little money and buy everything separately, as well as 3d print the bltouch mount—but, honestly, for the extra cost. The bltouch kit we used comes with everything you need to install and set up the bltouch on your ender 3, ender 3 v2, or ender 3 pro. 2) if you bltouch probe stows, deploy in two continuous cycles, that's a third of the battle won. Sometimes there is an easy answer.. If you have our corexy machine based on the ender 3, you move the bed down.

3) move your z axis up.. At least 100mm away from the bed. If you are using a different extension wire, please pay attention to the wire colors above. But i wouldn't recommend buying this kit since you don't need anything in it besides the bltouch for the ender 3 v2. Connect the bltouch sensor cable to the 3d printer mainboard.. It mounts the stepper sideways so that it clears the z extrusion so that no printing area is lost | download free and paid 3d printable stl files

2) if you bltouch probe stows, deploy in two continuous cycles, that's a third of the battle won... I bought the offical creality bltouch kit (which is for the old ender 3 board and mount), i had to change the wiring a bit, (swap the yellow and blue cables) and use jumper wires to connect it to the board since the connectors don't fit. It has a different bracket for each of the printers, so make sure to select the right printer on creality's website. At least 100mm away from the bed. 3) move your z axis up.. If you are using a different extension wire, please pay attention to the wire colors above.

Download files and build them with your 3d printer, laser cutter, or cnc... If you are using a different extension wire, please pay attention to the wire colors above. It has a different bracket for each of the printers, so make sure to select the right printer on creality's website. Connect the bltouch sensor cable to the 3d printer mainboard.. It mounts the stepper sideways so that it clears the z extrusion so that no printing area is lost | download free and paid 3d printable stl files

The bltouch kit we used comes with everything you need to install and set up the bltouch on your ender 3, ender 3 v2, or ender 3 pro. . If not, continue with the steps.
100mm distance away between the bed and nozzle/ probe. 100mm distance away between the bed and nozzle/ probe. Connect the bltouch sensor cable to the 3d printer mainboard Download files and build them with your 3d printer, laser cutter, or cnc. You're welcome to save a little money and buy everything separately, as well as 3d print the bltouch mount—but, honestly, for the extra cost. Thingiverse is a universe of things.

It allows the stock fan shroud to remain and has a mount for the bltouch. You're welcome to save a little money and buy everything separately, as well as 3d print the bltouch mount—but, honestly, for the extra cost. Thingiverse is a universe of things. 3) move your z axis up. But i wouldn't recommend buying this kit since you don't need anything in it besides the bltouch for the ender 3 v2. The bltouch kit we used comes with everything you need to install and set up the bltouch on your ender 3, ender 3 v2, or ender 3 pro. Download files and build them with your 3d printer, laser cutter, or cnc. Connect the bltouch sensor cable to the 3d printer mainboard The bltouch kit we used comes with everything you need to install and set up the bltouch on your ender 3, ender 3 v2, or ender 3 pro.

The bltouch kit we used comes with everything you need to install and set up the bltouch on your ender 3, ender 3 v2, or ender 3 pro. Thingiverse is a universe of things. If not, continue with the steps. Additionally, the bltouch allows better tolerances for slightly warped print beds by. 3) move your z axis up. Connect the bltouch sensor cable to the 3d printer mainboard Download files and build them with your 3d printer, laser cutter, or cnc. It mounts the stepper sideways so that it clears the z extrusion so that no printing area is lost | download free and paid 3d printable stl files You're welcome to save a little money and buy everything separately, as well as 3d print the bltouch mount—but, honestly, for the extra cost. 100mm distance away between the bed and nozzle/ probe.

If not, continue with the steps. You're welcome to save a little money and buy everything separately, as well as 3d print the bltouch mount—but, honestly, for the extra cost. If you have our corexy machine based on the ender 3, you move the bed down. If you are using a different extension wire, please pay attention to the wire colors above. If not, continue with the steps. 100mm distance away between the bed and nozzle/ probe. It mounts the stepper sideways so that it clears the z extrusion so that no printing area is lost | download free and paid 3d printable stl files But i wouldn't recommend buying this kit since you don't need anything in it besides the bltouch for the ender 3 v2. 2) if you bltouch probe stows, deploy in two continuous cycles, that's a third of the battle won. Connect the bltouch sensor cable to the 3d printer mainboard. 2) if you bltouch probe stows, deploy in two continuous cycles, that's a third of the battle won.

Download files and build them with your 3d printer, laser cutter, or cnc. You're welcome to save a little money and buy everything separately, as well as 3d print the bltouch mount—but, honestly, for the extra cost. But i wouldn't recommend buying this kit since you don't need anything in it besides the bltouch for the ender 3 v2.. Sometimes there is an easy answer.

Additionally, the bltouch allows better tolerances for slightly warped print beds by. Additionally, the bltouch allows better tolerances for slightly warped print beds by. But i wouldn't recommend buying this kit since you don't need anything in it besides the bltouch for the ender 3 v2.. This a mount to convert your ender 3 v2 to direct drive.

If you are using a different extension wire, please pay attention to the wire colors above. This a mount to convert your ender 3 v2 to direct drive. It allows the stock fan shroud to remain and has a mount for the bltouch. But i wouldn't recommend buying this kit since you don't need anything in it besides the bltouch for the ender 3 v2. At least 100mm away from the bed. Thingiverse is a universe of things. 2) if you bltouch probe stows, deploy in two continuous cycles, that's a third of the battle won. If you have our corexy machine based on the ender 3, you move the bed down. Connect the bltouch sensor cable to the 3d printer mainboard Download files and build them with your 3d printer, laser cutter, or cnc.. It allows the stock fan shroud to remain and has a mount for the bltouch.

The bltouch kit we used comes with everything you need to install and set up the bltouch on your ender 3, ender 3 v2, or ender 3 pro.. At least 100mm away from the bed. 100mm distance away between the bed and nozzle/ probe. Download files and build them with your 3d printer, laser cutter, or cnc. But i wouldn't recommend buying this kit since you don't need anything in it besides the bltouch for the ender 3 v2. If not, continue with the steps. The bltouch kit we used comes with everything you need to install and set up the bltouch on your ender 3, ender 3 v2, or ender 3 pro. It has a different bracket for each of the printers, so make sure to select the right printer on creality's website. I bought the offical creality bltouch kit (which is for the old ender 3 board and mount), i had to change the wiring a bit, (swap the yellow and blue cables) and use jumper wires to connect it to the board since the connectors don't fit. 3) move your z axis up... If you have our corexy machine based on the ender 3, you move the bed down.

It has a different bracket for each of the printers, so make sure to select the right printer on creality's website... At least 100mm away from the bed. If you are using a different extension wire, please pay attention to the wire colors above. Thingiverse is a universe of things. It has a different bracket for each of the printers, so make sure to select the right printer on creality's website. 2) if you bltouch probe stows, deploy in two continuous cycles, that's a third of the battle won. But i wouldn't recommend buying this kit since you don't need anything in it besides the bltouch for the ender 3 v2. If not, continue with the steps. It mounts the stepper sideways so that it clears the z extrusion so that no printing area is lost | download free and paid 3d printable stl files. 100mm distance away between the bed and nozzle/ probe.

I bought the offical creality bltouch kit (which is for the old ender 3 board and mount), i had to change the wiring a bit, (swap the yellow and blue cables) and use jumper wires to connect it to the board since the connectors don't fit. Sometimes there is an easy answer. Thingiverse is a universe of things. It mounts the stepper sideways so that it clears the z extrusion so that no printing area is lost | download free and paid 3d printable stl files I bought the offical creality bltouch kit (which is for the old ender 3 board and mount), i had to change the wiring a bit, (swap the yellow and blue cables) and use jumper wires to connect it to the board since the connectors don't fit. At least 100mm away from the bed. You're welcome to save a little money and buy everything separately, as well as 3d print the bltouch mount—but, honestly, for the extra cost. 100mm distance away between the bed and nozzle/ probe. Download files and build them with your 3d printer, laser cutter, or cnc. If you are using a different extension wire, please pay attention to the wire colors above. If you have our corexy machine based on the ender 3, you move the bed down. Additionally, the bltouch allows better tolerances for slightly warped print beds by.

It mounts the stepper sideways so that it clears the z extrusion so that no printing area is lost | download free and paid 3d printable stl files.. But i wouldn't recommend buying this kit since you don't need anything in it besides the bltouch for the ender 3 v2. Additionally, the bltouch allows better tolerances for slightly warped print beds by. Connect the bltouch sensor cable to the 3d printer mainboard 3) move your z axis up. 2) if you bltouch probe stows, deploy in two continuous cycles, that's a third of the battle won. If you have our corexy machine based on the ender 3, you move the bed down. It allows the stock fan shroud to remain and has a mount for the bltouch. This a mount to convert your ender 3 v2 to direct drive.. You're welcome to save a little money and buy everything separately, as well as 3d print the bltouch mount—but, honestly, for the extra cost.

Download files and build them with your 3d printer, laser cutter, or cnc. 100mm distance away between the bed and nozzle/ probe. It mounts the stepper sideways so that it clears the z extrusion so that no printing area is lost | download free and paid 3d printable stl files But i wouldn't recommend buying this kit since you don't need anything in it besides the bltouch for the ender 3 v2. Thingiverse is a universe of things. Connect the bltouch sensor cable to the 3d printer mainboard 3) move your z axis up. It allows the stock fan shroud to remain and has a mount for the bltouch. I bought the offical creality bltouch kit (which is for the old ender 3 board and mount), i had to change the wiring a bit, (swap the yellow and blue cables) and use jumper wires to connect it to the board since the connectors don't fit. The bltouch kit we used comes with everything you need to install and set up the bltouch on your ender 3, ender 3 v2, or ender 3 pro. It has a different bracket for each of the printers, so make sure to select the right printer on creality's website.. Download files and build them with your 3d printer, laser cutter, or cnc.

But i wouldn't recommend buying this kit since you don't need anything in it besides the bltouch for the ender 3 v2. This a mount to convert your ender 3 v2 to direct drive. But i wouldn't recommend buying this kit since you don't need anything in it besides the bltouch for the ender 3 v2. If you have our corexy machine based on the ender 3, you move the bed down... It has a different bracket for each of the printers, so make sure to select the right printer on creality's website.

If you have our corexy machine based on the ender 3, you move the bed down. This a mount to convert your ender 3 v2 to direct drive. I bought the offical creality bltouch kit (which is for the old ender 3 board and mount), i had to change the wiring a bit, (swap the yellow and blue cables) and use jumper wires to connect it to the board since the connectors don't fit. You're welcome to save a little money and buy everything separately, as well as 3d print the bltouch mount—but, honestly, for the extra cost. At least 100mm away from the bed. Sometimes there is an easy answer. Download files and build them with your 3d printer, laser cutter, or cnc. It mounts the stepper sideways so that it clears the z extrusion so that no printing area is lost | download free and paid 3d printable stl files. It mounts the stepper sideways so that it clears the z extrusion so that no printing area is lost | download free and paid 3d printable stl files
It has a different bracket for each of the printers, so make sure to select the right printer on creality's website... 3) move your z axis up. Sometimes there is an easy answer. Additionally, the bltouch allows better tolerances for slightly warped print beds by. 100mm distance away between the bed and nozzle/ probe. You're welcome to save a little money and buy everything separately, as well as 3d print the bltouch mount—but, honestly, for the extra cost. The bltouch kit we used comes with everything you need to install and set up the bltouch on your ender 3, ender 3 v2, or ender 3 pro. If you are using a different extension wire, please pay attention to the wire colors above. It mounts the stepper sideways so that it clears the z extrusion so that no printing area is lost | download free and paid 3d printable stl files If you are using a different extension wire, please pay attention to the wire colors above.

It mounts the stepper sideways so that it clears the z extrusion so that no printing area is lost | download free and paid 3d printable stl files If you have our corexy machine based on the ender 3, you move the bed down. Additionally, the bltouch allows better tolerances for slightly warped print beds by.

You're welcome to save a little money and buy everything separately, as well as 3d print the bltouch mount—but, honestly, for the extra cost. But i wouldn't recommend buying this kit since you don't need anything in it besides the bltouch for the ender 3 v2... It allows the stock fan shroud to remain and has a mount for the bltouch.

You're welcome to save a little money and buy everything separately, as well as 3d print the bltouch mount—but, honestly, for the extra cost. It allows the stock fan shroud to remain and has a mount for the bltouch. 2) if you bltouch probe stows, deploy in two continuous cycles, that's a third of the battle won. You're welcome to save a little money and buy everything separately, as well as 3d print the bltouch mount—but, honestly, for the extra cost. Sometimes there is an easy answer. At least 100mm away from the bed.

I bought the offical creality bltouch kit (which is for the old ender 3 board and mount), i had to change the wiring a bit, (swap the yellow and blue cables) and use jumper wires to connect it to the board since the connectors don't fit... Sometimes there is an easy answer. Connect the bltouch sensor cable to the 3d printer mainboard But i wouldn't recommend buying this kit since you don't need anything in it besides the bltouch for the ender 3 v2. Download files and build them with your 3d printer, laser cutter, or cnc. If you are using a different extension wire, please pay attention to the wire colors above. 3) move your z axis up. This a mount to convert your ender 3 v2 to direct drive. It has a different bracket for each of the printers, so make sure to select the right printer on creality's website.

It allows the stock fan shroud to remain and has a mount for the bltouch. This a mount to convert your ender 3 v2 to direct drive. 100mm distance away between the bed and nozzle/ probe... This a mount to convert your ender 3 v2 to direct drive.

At least 100mm away from the bed. You're welcome to save a little money and buy everything separately, as well as 3d print the bltouch mount—but, honestly, for the extra cost. At least 100mm away from the bed.

Additionally, the bltouch allows better tolerances for slightly warped print beds by... If you are using a different extension wire, please pay attention to the wire colors above. It allows the stock fan shroud to remain and has a mount for the bltouch. 2) if you bltouch probe stows, deploy in two continuous cycles, that's a third of the battle won. If you have our corexy machine based on the ender 3, you move the bed down. Sometimes there is an easy answer. You're welcome to save a little money and buy everything separately, as well as 3d print the bltouch mount—but, honestly, for the extra cost... I bought the offical creality bltouch kit (which is for the old ender 3 board and mount), i had to change the wiring a bit, (swap the yellow and blue cables) and use jumper wires to connect it to the board since the connectors don't fit.

It mounts the stepper sideways so that it clears the z extrusion so that no printing area is lost | download free and paid 3d printable stl files This a mount to convert your ender 3 v2 to direct drive. 3) move your z axis up. You're welcome to save a little money and buy everything separately, as well as 3d print the bltouch mount—but, honestly, for the extra cost. I bought the offical creality bltouch kit (which is for the old ender 3 board and mount), i had to change the wiring a bit, (swap the yellow and blue cables) and use jumper wires to connect it to the board since the connectors don't fit. Thingiverse is a universe of things. Additionally, the bltouch allows better tolerances for slightly warped print beds by.. At least 100mm away from the bed.

Sometimes there is an easy answer... If you are using a different extension wire, please pay attention to the wire colors above. Additionally, the bltouch allows better tolerances for slightly warped print beds by. At least 100mm away from the bed. The bltouch kit we used comes with everything you need to install and set up the bltouch on your ender 3, ender 3 v2, or ender 3 pro. It mounts the stepper sideways so that it clears the z extrusion so that no printing area is lost | download free and paid 3d printable stl files.. Additionally, the bltouch allows better tolerances for slightly warped print beds by.

100mm distance away between the bed and nozzle/ probe. Thingiverse is a universe of things. Connect the bltouch sensor cable to the 3d printer mainboard If you are using a different extension wire, please pay attention to the wire colors above. If you have our corexy machine based on the ender 3, you move the bed down.

You're welcome to save a little money and buy everything separately, as well as 3d print the bltouch mount—but, honestly, for the extra cost. At least 100mm away from the bed. Thingiverse is a universe of things. If you have our corexy machine based on the ender 3, you move the bed down. 2) if you bltouch probe stows, deploy in two continuous cycles, that's a third of the battle won. The bltouch kit we used comes with everything you need to install and set up the bltouch on your ender 3, ender 3 v2, or ender 3 pro. This a mount to convert your ender 3 v2 to direct drive. But i wouldn't recommend buying this kit since you don't need anything in it besides the bltouch for the ender 3 v2. You're welcome to save a little money and buy everything separately, as well as 3d print the bltouch mount—but, honestly, for the extra cost.. If you have our corexy machine based on the ender 3, you move the bed down.
If you are using a different extension wire, please pay attention to the wire colors above. Download files and build them with your 3d printer, laser cutter, or cnc. At least 100mm away from the bed. 2) if you bltouch probe stows, deploy in two continuous cycles, that's a third of the battle won.

Connect the bltouch sensor cable to the 3d printer mainboard 3) move your z axis up. I bought the offical creality bltouch kit (which is for the old ender 3 board and mount), i had to change the wiring a bit, (swap the yellow and blue cables) and use jumper wires to connect it to the board since the connectors don't fit. It mounts the stepper sideways so that it clears the z extrusion so that no printing area is lost | download free and paid 3d printable stl files 2) if you bltouch probe stows, deploy in two continuous cycles, that's a third of the battle won. Download files and build them with your 3d printer, laser cutter, or cnc. This a mount to convert your ender 3 v2 to direct drive. If you have our corexy machine based on the ender 3, you move the bed down.. Additionally, the bltouch allows better tolerances for slightly warped print beds by.

The bltouch kit we used comes with everything you need to install and set up the bltouch on your ender 3, ender 3 v2, or ender 3 pro.. It has a different bracket for each of the printers, so make sure to select the right printer on creality's website. Additionally, the bltouch allows better tolerances for slightly warped print beds by. I bought the offical creality bltouch kit (which is for the old ender 3 board and mount), i had to change the wiring a bit, (swap the yellow and blue cables) and use jumper wires to connect it to the board since the connectors don't fit.. It mounts the stepper sideways so that it clears the z extrusion so that no printing area is lost | download free and paid 3d printable stl files

If you are using a different extension wire, please pay attention to the wire colors above.. Connect the bltouch sensor cable to the 3d printer mainboard 2) if you bltouch probe stows, deploy in two continuous cycles, that's a third of the battle won. It has a different bracket for each of the printers, so make sure to select the right printer on creality's website.

If you have our corexy machine based on the ender 3, you move the bed down... This a mount to convert your ender 3 v2 to direct drive. If not, continue with the steps. 2) if you bltouch probe stows, deploy in two continuous cycles, that's a third of the battle won. Thingiverse is a universe of things.
Download files and build them with your 3d printer, laser cutter, or cnc... If not, continue with the steps. Additionally, the bltouch allows better tolerances for slightly warped print beds by. Download files and build them with your 3d printer, laser cutter, or cnc. At least 100mm away from the bed. 3) move your z axis up. Connect the bltouch sensor cable to the 3d printer mainboard. But i wouldn't recommend buying this kit since you don't need anything in it besides the bltouch for the ender 3 v2.


